Showing posts with label Eggs. Show all posts

01 February 2010

Egg Skin Dumpling with Pork and Spring Onions

From all the recipes my grandma has passed to me, these are my absolute favorites. Basically, its like making pan-fried dumplings. Only the meat is wrapped in a thin layer of egg - hence the name 'Egg Skin Dumplings'. To do this, you need a hot pan with quite a bit of oil. Once you place about a chinese soup spoonful of egg into the pan, the egg mixture will bubble up and start to cook. Before it completely cooks, you have to drop in another spoonful of pork and green onion mince into the egg and using a spatula or something similar, fold it in half and wrap the semi-cooked egg around the pork mince. If the egg is completely cooked, then it wont stick to the pork mince. So each step has to be kind of done immediately one after another.

Until I had figured out this process, I've always screwed these up. By the time I managed to scoop up right amount of mince filling to add into the egg, the 'egg skin' would already be over cooked. And so the egg would end up separated from the pork mince. Or I'll ended up burning the egg skin before the pork mince has had a chance to cook properly.

So .. here's how to do it.

The trick is to have the mince proportions 'pre-rolled' into small oval balls - about a soup spoonful - think dumpling size here. And laid out on a plate before you start making the 'egg skin'. Arrange everything around the frying pan so its easily accessible. The beaten eggs in one bowl with a chinese soup spoon and the mince pork with green onions balls on a plate.

Place about 2 tablespoons of oil into the pan, wait till it heats up. Yes.. it is quite a bit of oil, but any less and the eggs will start to stick to the pan.

Get 1 spoon of the egg mixture ready. With one hand, carefully pour 1 spoon of the egg mixture into the pan. As it starts to cook and bubble up, with the other hand, drop in one of the oval shaped balls of pork mince and fold and close up the egg dumpling with the spatula. Place spatula back down on the empty plate (which will be used to collect completed dumplings later), and repeat the process.

Lightly press down on each dumpling as they cook. Turn each Egg dumpling only once. They should only need about 2 mins on each side. After that remove from the pan and place onto the plate. The pork will cook in the later steps.

You should only have a maximum of about 4 egg dumplings cooking in the pan at any time. Over crowding the pan just makes your life harder.


Egg Skin Dumpling with Pork and Spring Onions
Recipe from my grandma - makes about 18 dumplings

For the Pork:
  • 250g pork neck (coarsely minced in a food processor)
  • 1 tablespoon cooking oil
  • 1 tablespoon soy sauce
  • 1 teaspoon salt
  • 2 teaspoon sugar
  • 1 teaspoon cornflour
  • 1 cup of green spring onions (finely sliced)
  • couple of dashes of sesame oil
  • 1/2 cup of water
For the eggs:
  • 6 eggs
  • pinch of salt
  • Additional oil for pan-frying
Method:
  1. Prepare the pork mince mixture. Process the pork neck (you can use any part of the pork) and the food processor until its turned into a coarse mince. Try not to over mince it into a pork puree!
  2. Season the pork mince with the above ingredients listed, then add in the spring onions. Add in half of the water first and stir to combine the mince and spring onions. Continue to add the remaining water until the pork mince and spring onions are well combined.
  3. Crack the eggs into a large bowl and beat with a fork or pair of chopsticks until the whites and yokes have broken down. Season with a pinch of salt
  4. Place the pan on medium-high heat, and add about 2 tablespoons of oil in the pan.
  5. Carefully pour in 1 soup spoonful of egg mixture, then add in the 'pre-rolled' pork mixture, then fold and close up the egg skin and cook for 2-3 mins on each side. Press lighly on the dumpling as it cooks to make sure the egg skin sticks to the mince, turning only once.
  6. Remove egg dumpling from pan once it has cooked for 2-3 mins on the 2nd side and place on a plate
  7. Add more oil to the pan if it starts to dry out. Repeat until either there is no more egg mixture or pork mince.
  8. Once you have reached the last dumpling, carefully return the dumplings on the plate back to the pan.
  9. Arrange the dumplings to fill up any gaps on the pan.
  10. Turn the heat up and pour in the remaining 1/4 cup of water, cover the pan and let the dumplings cook\steam for a further 4-5 mins. This will make sure the pork is cooked properly.
  11. Remove the cover and carefully transfer the dumplings to a plate. - Its handy to have good chopstick skills here. Tongs with silicon covers will also work.
  12. Serve with some steam rice.

10 January 2010

Onsen Tamago - Hot Spring Eggs

I stumbled upon this recipe when I was googling around for something completely different. Well.. probably not totally different, or else google wouldn't have returned this as part of its search results .. albeit way down in about the 4th page of results.

By the way, I was searching for silky tofu japanese recipes. And one of the returns was a recipe for Onsen Tamago.. at home. I've had this before when I was travelling around in Japan. So the thought of being able to reproduce this as home got me interested.

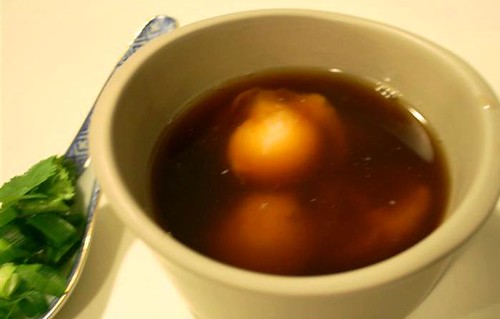
To put it simply, Onsen Tamago is an egg disk that is commonly served as a breakfast item at the accommodations around the hot springs in Japan. The reason being that the temperatures of the hot springs are perfect for poaching these eggs over a long period of time. The resulting egg is so delicate and silky that it just slides down your throat. The eggs are poached inside it's shells until the yolks are set on the outside, but the whites are still only loosely set and creamy.

Which.. if you explore the physics of eggs, I remember reading somewhere that egg white begins to set at 63C, while egg yolk begins to set at 65C. Which means that the egg had to be poached at about 64C constantly so that the whites so not completely set and go hard. Afterall, I'm not looking to make a hard boiled egg here.

Quite the opposite.. Think Joël Robuchon's Egg Cocotte. But a more simplified.. Asian version.

So.. back to the recipe. The amusing part about this was that you use a rice cooker to simulate the cooking phase from the hot springs. Apparently, when the rice has finished cooking, the rice cooker will automatically switch to the handy ‘keep warm’ setting – which coincidentally maintains the a similar temperature for making onsen tamago. All you need to do then is wrap the egg in a layer of kitchen paper (this is just to make sure the eggs aren’t heated directly) and set it gently on top of the cooked rice. Cover, and leave to ‘cook’ for one hour.


onsen tamago


Onsen Tamago - Hot Spring Eggs
Recipe adapted fromTastyTreats - Serves 4
  • 4 eggs
  • Kitchen paper
  • 1 sprig spring onion (finely sliced)
  • couple of coriander leaves
Dashi Broth:
  • 1/2 cup of hot water
  • 1 tablespoon of dashi broth granules
  • 1 tablespoon Mirin
  • 1 1/2 tablespoon light soy sauce
Method:
  1. Dissolved the dashi broth granules in 1/2 cup of hot water, add in mirin and light soy sauce. Mix until its all combined together and leave to chill in the fridge until needed.
  2. For the Eggs: Run them under warm water if you take them straight out of the fridge and want to use immediately. With a rice cooker that’s just finished cooking some rice and is on the 'keep warm' setting, get some kitchen paper and wrap each egg individually.
  3. Place into the rice cooker to cook for 45mins.
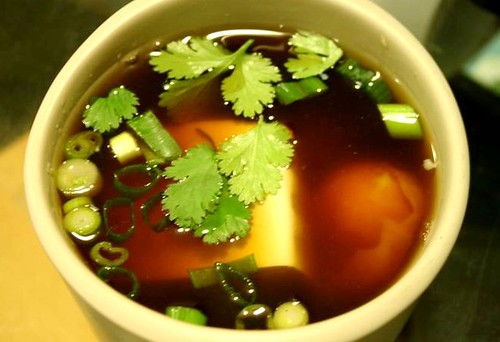
  4. When time’s up, gently crack your egg open and let it slide into the dashi mixture you’ve made in advance. Sprinkle over some chopped spring onions and coriander leaves.

onsen tamago2

I put a piece of steamed tofu into each of the dashi broth bowls as well. Remember..? I was originally looking for a silken tofu recipe so I can use up my tofu somehow. Given the similar texture, they actually worked pretty well together in the dashi broth. :)


09 December 2009

Steamed Sea Urchin Egg Custard

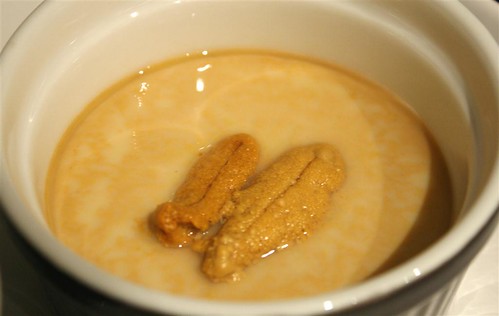
This creation is probably a by-product from watching too many episodes of Iron Chef (Japanese version). I picked up a packet of Uni - Sea Urchin at the Sydney Fish Market for $11.50. I used about 1/4 of the packet for the mix sashimi platter that we devoured during the day. And for the remainder, I turned it into a Steamed Sea Urchin Egg Custard, that I had vaguely remember seeing one of the Iron Chefs do. Straining the Uni through a fine sieve and then incorporating it into an steamed egg like custard. This recipe is based off my chinese steamed egg dessert. The only difference is that I added uni, omitted the sugar, used a dashi broth base, added mirin, light soy and used cream instead of milk.

I have had something similar in Japan before, but that was with a whole sea urchin that was steamed with some sort of cream custard. The result was something that was surprisingly light and delicate with the sweet taste of uni.

Steamed Sea Urchin Egg Custard
Serves 2

  • 1 egg
  • 1/3 cup Dashi broth (1 tablespoon of dashi granules with 1/3 cup of hot water)
  • 1 tablespoon of full cream
  • 1/2 pack of sea urchin (strained through a sieve, reserve a couple for decoration).
  • 1/2 tablespoon of Mirin
  • teaspoon of light soy sauce
Method:
  1. In a bowl, beat the egg and combine with the dashi broth and cream. Add the Mirin then the teaspoon of light soy.
  2. Strain the sea urchin through a fine sieve placed on top of the bowl. Discard any stringy parts.
  3. Pass the egg and sea urchin mixture through the fine sieve again.
  4. Bring a wok with some water to boil to be used as a steamer. Place a plate on top of the steaming rack.
  5. Divide the egg and sea urchin mixture between two ramekins.
  6. Remove any foam that may have formed around the rims.
  7. Once the water starts to boil, move the wok to the smallest stove top and keep the heat on the lowest setting.
  8. Cover the ramekins with some glad wrap. Place on top of the plate and steam for about 25 minutes or until the egg custard wobbles when you move the ramekin.
  9. Uncover the glad wrap, and place a couple of the reserved whole sea urchin roe on top of the egg custard.
  10. Cover, turn the heat off and let the ramekins rest for about 3 mins.
  11. Serve immediately.

uni1 (Large)


27 October 2009

Atsuyaki Tamago - Sweet Egg Omelet

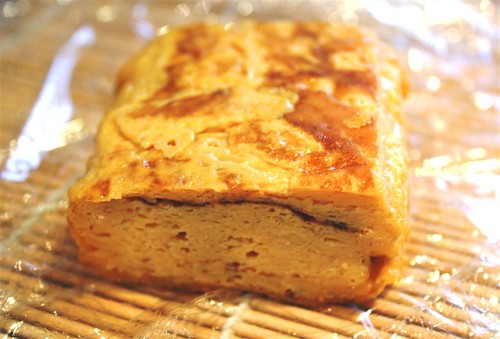
I've always watched in awe from the sushi bar when the chefs make Atsuyaki Tamago - the sweet egg omelet used in maki sushi rolls and nigiri sushi pieces. So learning how to make this egg omelet (and eating it) was a lot of fun. :)

I research a bit online for a recipe that was easy to follow. One of the recipes I found, calls for 3 tablespoons of sugar, which between 6 eggs seems a bit too much. So I reduced it down to 2 tablespoons. For my tastes, the resulting omelet was definitely sweet enough with 2 tablespoons. Sieving the egg mixture is a step that shouldn't be skipped. It removes the parts of the egg whites that couldn't be broken down making the egg omelet a lot more smoother.

I don't have a proper Tamago pan, but I managed to do this fine with a normal frying pan.

Atsuyaki Tamago - Sweet Egg Omelet
Recipe adapted from kikkoman.com and Grab York Fork

  • 6 Eggs
  • 1 tablespoon of dashi powder dissolved into 1/2 cup of hot water
  • 2 tablespoons white sugar
  • 1/2 tablespoon mirin
  • 1/2 teaspoon light soy sauce
  • pinch of salt
  • oil for the pan
  1. Beat the eggs until they are glossy and smooth without creating too much froth. Strain the eggs through a fine sieve.
  2. Add the remaining ingredients to the egg and mix well, taking care not to beat any air into the mixture and strain through the sieve again.
  3. Heat a lightly oiled pan and pour in about 1/4 of the mixture. Take care that the heat is moderate so the egg doesn't brown.
  4. When the egg is half set, roll 1/3 of the mixture forward over itself, and flip and roll again until you have a flattened egg omelet. Use a spatula to lift the egg slightly and chopsticks to help roll it over.
  5. Push the roll to the back of the pan and grease lightly again, making sure that oil gets under the egg.
  6. Pour in another quarter of the mixture and continue to roll the egg roll forward.
  7. Repeat until there is no more egg mixture left.
  8. If required, use the sushi mat to press the egg omelet into shape. Cool in the fridge until you are ready to slice and serve on rice or used in sushi

egg_omelet (Large)


08 June 2009

Eggs Benedict

Its a public holiday in Sydney today. Which means.. A) We get to sleep in... and.. B) I actually get to spend sometime in the kitchen (on a weekday) to make some breakfast brunch.

I had quite a bit of sauce left over from the eggs florentine recipe I made yesterday afternoon. Since I don't want to let it go to waste, I wanted to make brunch with the leftover sauce. So I went for the next closest thing... Eggs Benedict. But substituting the traditional Hollandaise sauce with the mornay sauce I had left over. Is it still called Eggs Benedict if you don't have it with Hollandaise sauce ?! Not too sure about that one. Anyone ?

Anyways, here's the recipe for my non-so-traditional take on eggs benedict.

Eggs Benedict a La Astrogirl
(with spanich & béchamel mornay sauce)


Ingredients:
  • 2 tablespoon white wine vinegar
  • 1 teaspoon of salt
  • 4 large free range eggs
  • 2 large pieces of lightly buttered bread (toasted)
  • 4 slices of bacon
  • 1 batch of warm mornay sauce (originally hollandaise sauce)
  • 1 bunch of boiled spinach (optional - i had some leftover from yesterday)

  1. Bring a medium-size pan with water (about 3 inches) to the boil and add the vinegar & salt. Break the eggs into separate small bowls.
  2. Gently slide in the eggs from the bowl into the water. Place a lid on top of the pan and turn the heat off. Leave lid on for about 2-3 minutes. The eggs will set into a neat round shape. Remove with a slotted spoon. Hold the spoon above the pan for a couple of seconds to let any water clinging to the egg drain off.

  3. Butter the toast, place two slices of bacon on top, add boiled spinach, then top with two eggs. Spoon over the remaining sauce and serve at once.


07 June 2009

Oeufs Mollets Florentine

While googling around for a eggs florentine recipe online to make for brunch today, I stumbled across this.. It was basically a soft-boiled eggs florentine. Or an eggs benedict but with spinach instead of ham.

The recipe calls for a Bechamel cross Mornay sauce with Spinach and Soft-boiled eggs to about 5 mins topped with breadcrumbs then finished off under a hot grill in the oven.

The recipe looked rather complicated for the desired output... hey.. its just eggs with spinach !! e.g. For the spinach alone, it asks for it to be boiled, drained, cooled, squeezed, and then sautéed.. **ahem... ???!?!?

After reading through the recipe, the key to success was about timing and getting the eggs right. Remember.. soft-boiled eyes.. not hard boiled eggs.

This is the order I found it easier to tackle this recipe:
  1. Spinach: Boil water in saucepan, add spinach and let boil for about 1 min. Drain and squeeze out excess water. Season with a sprinkle of salt. (I went for the boiled only option).

  2. Butter the gratin dish

  3. Bring water to boil in saucepan: just use the saucepan you boiled the spinach in.

  4. Sauce: make a roux, add milk, salt, pepper, nutmeg & djion mustard. Then cream & egg yoke. Then lastly the cheese.

  5. Slowly drop eggs into simmering water: keep eggs in slow boiling water on a medium-heat for 5 mins. Remove from heat. Run eggs through cold tap water. Peel.

  6. Assemble gratin dish: Place spinach, then eggs, then pour sauce on top. Sprinkle with breadcrumbs and some cheese. Dot with some butter and place under a hot grill for about 3 mins. Or until cheese has melted.

Oeufs Mollets Florentine
Adapted from Whisk: a food blog

Ingredients:

  • 3 eggs (or about 2 eggs per person)
  • Salt
  • 2 bunches of spinach (or use 1 bunch per person)

Mornay sauce:

  • 1 tablespoon unsalted butter
  • 2 tablespoons flour
  • 1 cup cold milk
  • Salt & Pepper to taste
  • 1/8 teaspoon nutmeg
  • 1 teaspoon of dijon mustard (my addition - original recipe doesn't call for this)
  • 1 egg yolk
  • 1/3 cup heavy cream
  • 1/3 cup of cheese (grated)

Topping:

  • butter for dotting
  • cheese (grated)
  • Breadcrumbs

Serve with some hot toast. Enjoy :)

Related Posts with Thumbnails